This high demand for videos has resulted in many companies offering programs to make creating videos easier. VideoMakerFX, a template-based video builder for Windows and Mac, is an example of one such software program. It is easy-to-use and helps marketers and business owners create animated videos to promote their message in an engaging and visually appealing way. With VideoMakerFX, you can create animated videos such as:
AnimationWhiteboardKinetic textLogo openersCorporate presentationsPhoto showcasesLower thirds, and more
Although it is not a free program, it is only a one-time fee of $27, including full developer rights. Below is a tutorial on how to create a video using VideoMakerFX.
Getting Started
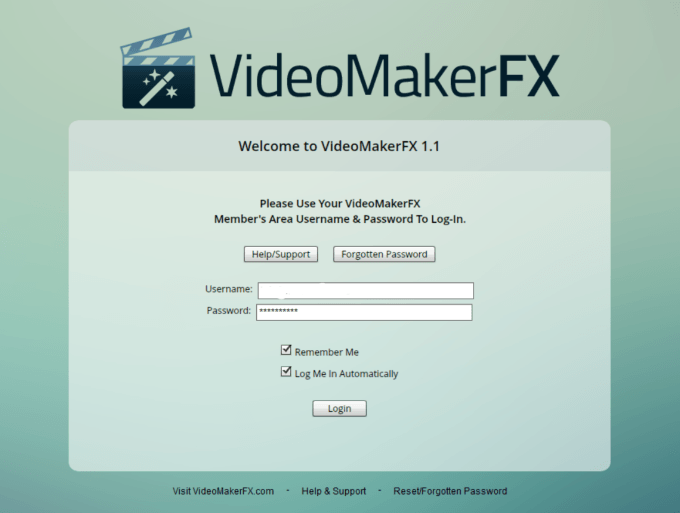
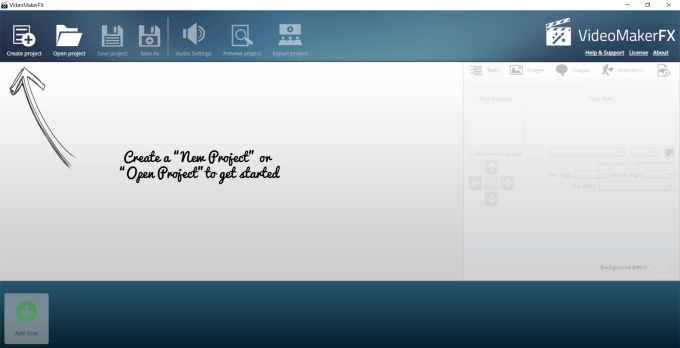
After you purchase and download VideoMakerFX, launch it from the Windows Start Menu. If you are using a Mac, launch it from the Applications folder. Once launched, log into the software with the same username and password you use to log into the member’s area. Keep in mind that if you change the member’s area login credentials, you will need to use the same new logins to access the software. You also need to have an Internet connection. After you log in, you will see an intuitive dashboard. See the large arrow pointing to Create project and the description that tells you very clearly how to get started. It says Create a New Project or Open Project to get started.
Create a New Video
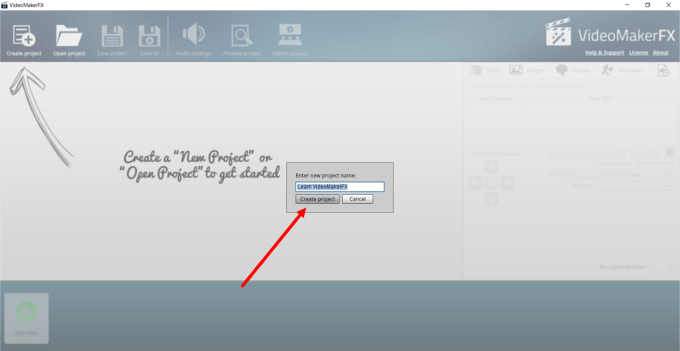
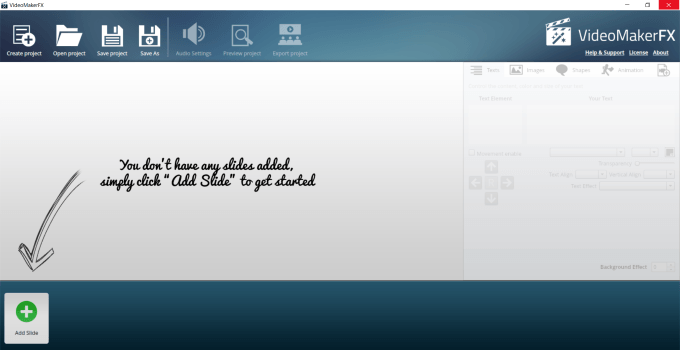
Start by clicking the + sign to start a new project. You will then be prompted to give your video a name. Let’s call this one Learn VideoMakerFX. Then click Create project. After you create your project, the screen shows you that you don’t have any slides added. Simply click Add Slide to get started.
Add Slides To Your Video
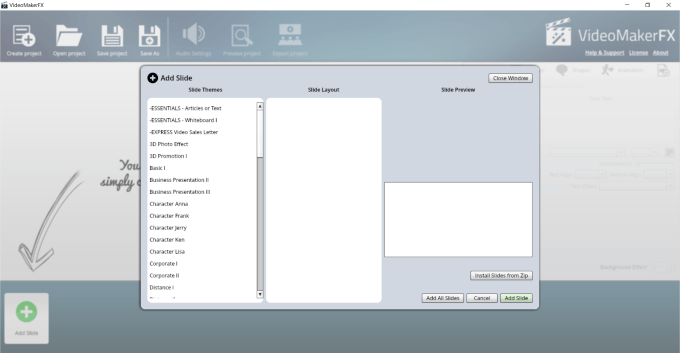
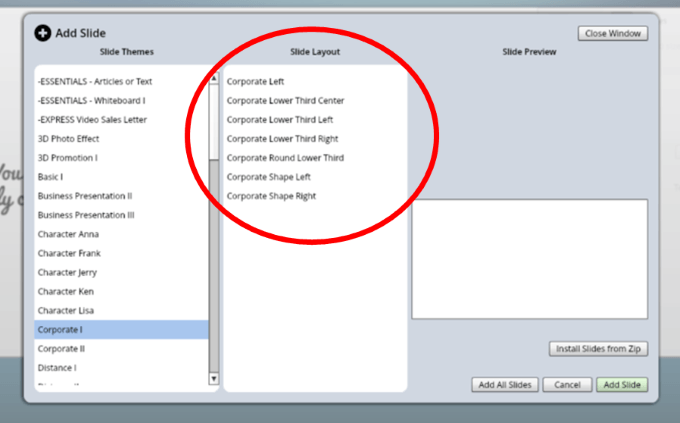
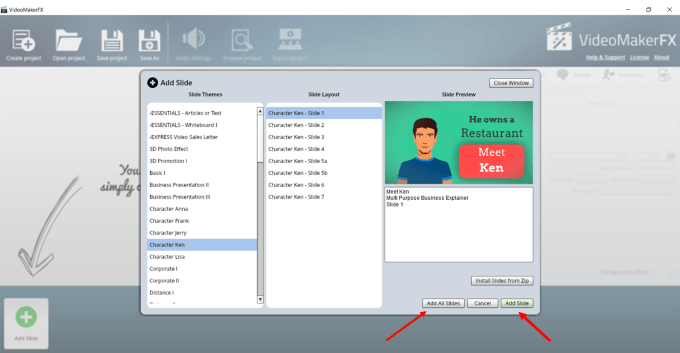
After you click Add Slide, you will see the options shown in the screenshot below. In the pop-up window, see the Slide Theme options on the left for you to select. Within each theme, there are more possible layouts. If you click on each layout, you can see a preview of the slide and decide whether to use it or not. If you like it, you can either add just the one slide or all of them from the theme. The main product comes with many templates. However, you can also purchase additional packs. They even have a membership site where you can get new slides every month. But there is so much you can do with the basic program. So this article will focus on the main software. If you choose to use all the layouts from one template, this is the easiest way to create your first video. When you select all the layouts in a theme, they will show up on your storyboard.
Edit The Slides
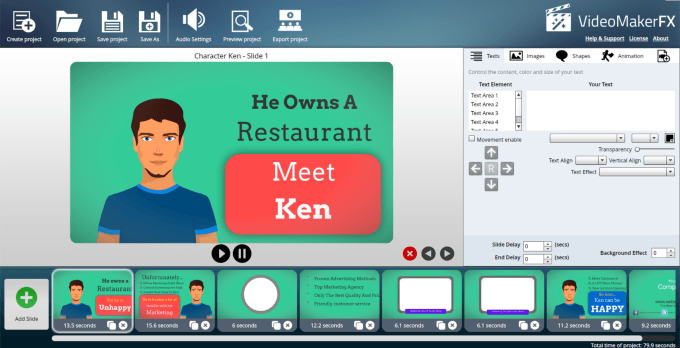
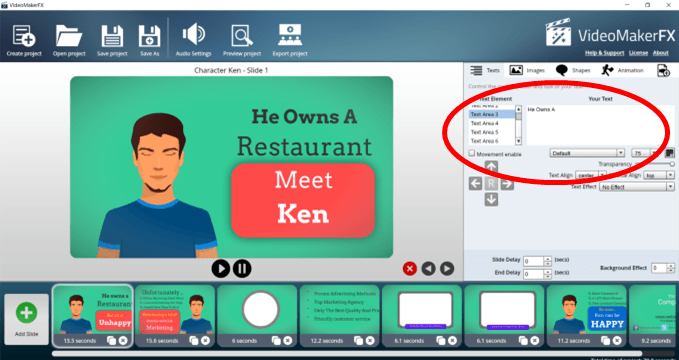
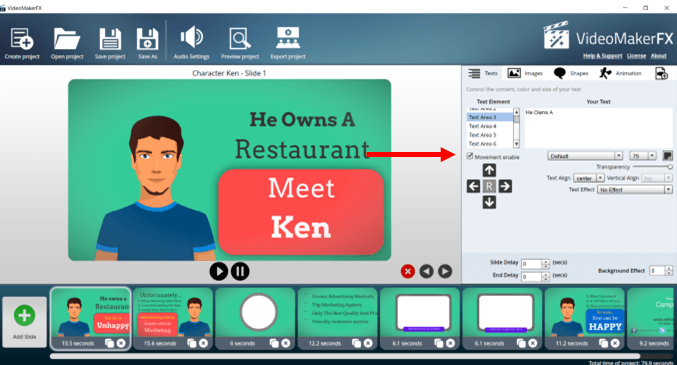
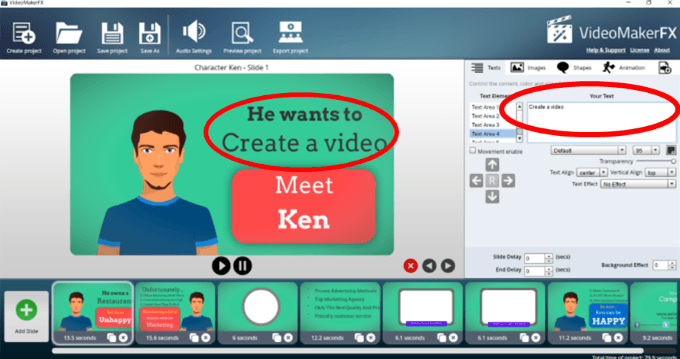
Let’s start with the first slide. Look over on the right side, which is the editing section. Click on the 6 Text Areas for this slide and see which words are in each space to match up which text area is which. You will notice many areas where you can make changes to the text. See the arrows under Movement enabled. If you want to move a text area up, down, left, or right, select the Text area, tick off the Movement enabled box and use the arrows to reposition the text. If you want to add text that doesn’t fit into the space provided, you can make the font size smaller. You can also change the font type, size, color, text alignment, transparency, slide delay, background effect, and text effects. Play around with the different options to see what you like best. To change the text, put your cursor in the area that says Your Text, remove what is there and add your own. If you want to use slides in a different order, click on the side you want to move. Then click on the left or right arrows above the storyboard. To delete a slide, select it and click the red x over the storyboard. A slide can also be duplicated by clicking on the clone icon (two little boxes) next to the x on any individual slide.
Change Images
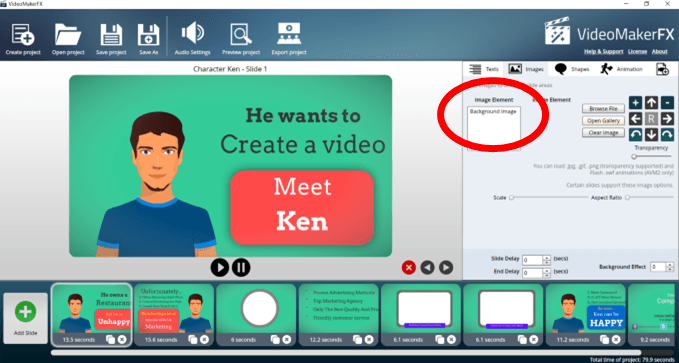
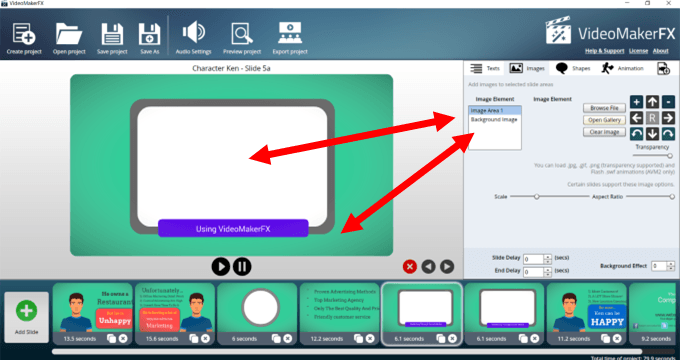
Some slides only have a background image. See the screenshot below. You can replace the background image by:
Browsing for a file on your computerChoosing one from the gallery provided by VideoMakerFXClearing the image if you don’t want to include one
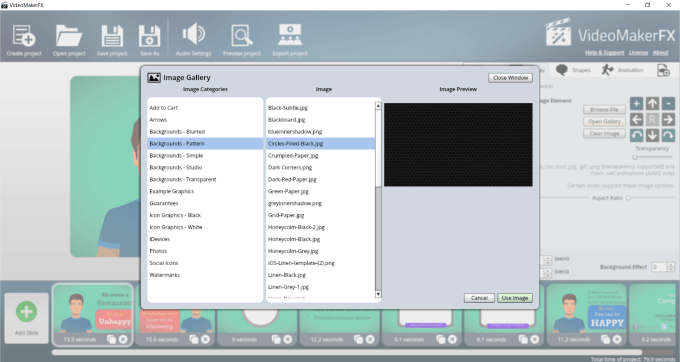
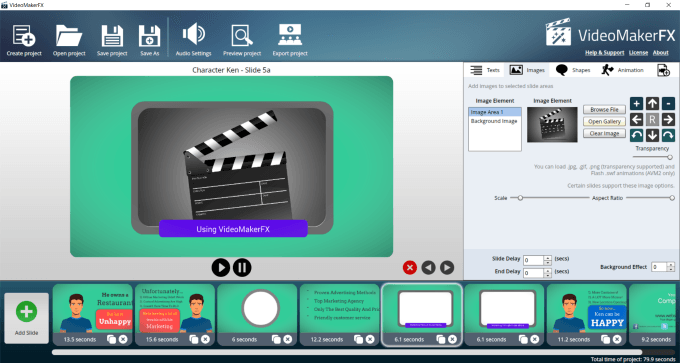
See the screenshot below to get an idea of the available options provided in the gallery. Some of the slides have additional areas where you can add images in addition to changing the background. In the screenshot below, you can see where I uploaded a picture from my computer to fill the white rectangular space. It didn’t take up the entire area, so I clicked on the + icon to increase the size and fill up the space.
Modify Shapes
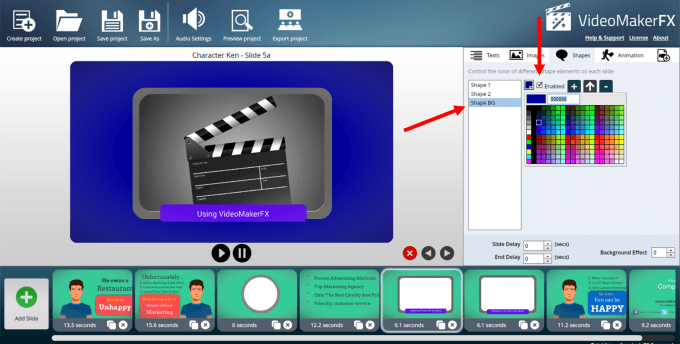
You can also turn the shapes on or off, change the color, and move them around on the slide. Tick Enable on and off to see which ones can be changed. If you want to change the background color of a slide, click inside the color box next to the Shape BG with Enabled ticked on and choose the color you want to use. See in the screenshot below that the background of the image is now blue.
Animations
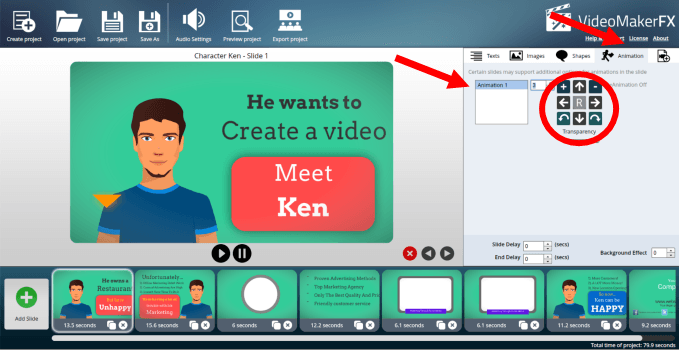
There are two sets of animations, but not all slides offer both. For example, the slide below with the character only provides options for Animation 1. Note that you can select one of the nine options and move it around using the arrows (circled below). You can also choose not to use any animations. For the slides that come with two sets of animations, the process is the same as described above. When you are finished changing the slide to how you want it to look, you can preview it by clicking the play button under the slide.
Change the Slide Time Length
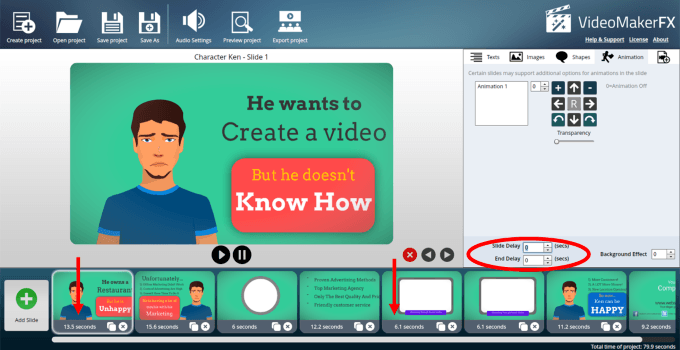
Each slide comes with a standard amount of time allotted to it. You can also delay the slide or end the delay, which will add time before the side begins or make it last longer (see circled area below).
Add Audio
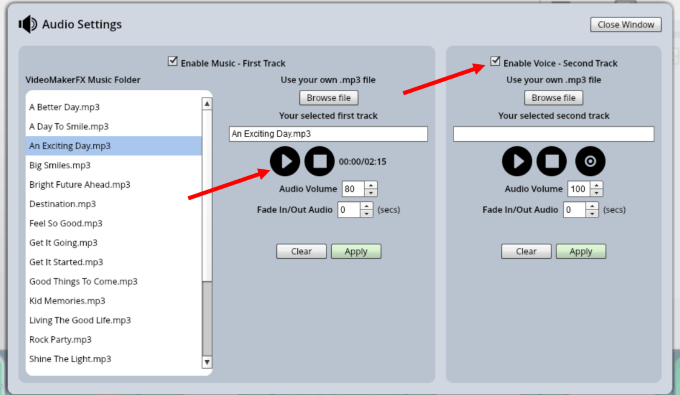
In the top bar navigation, click on Audio Settings. VideoMakerFX provides copyright-free audio files for you to include in your videos. To listen to a track, select it and click on the Play button. You can set the volume of the audio file and choose to fade it in or out. Once you find the music you like, select it and click Apply. If you have your own file (it must be .mp3), you can upload it as well. You can add a voiceover file to any music or use it alone by uploading the .mp3. Note that there are separate setting options with the same controls for a music file and a voiceover file.
Preview Your Video
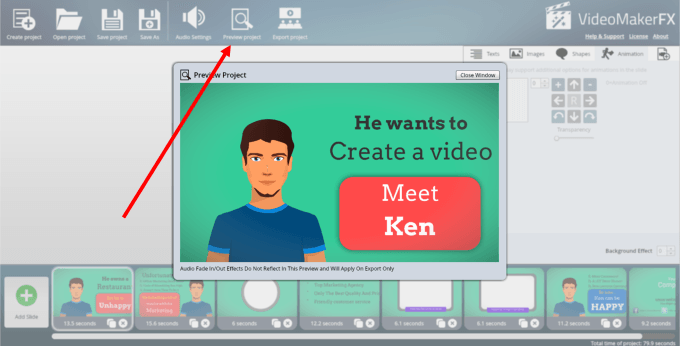
Before you render your project, you can preview it to see if you like all the changes you made. Look for and click the Preview project button in the top navigation.
Export Your Video
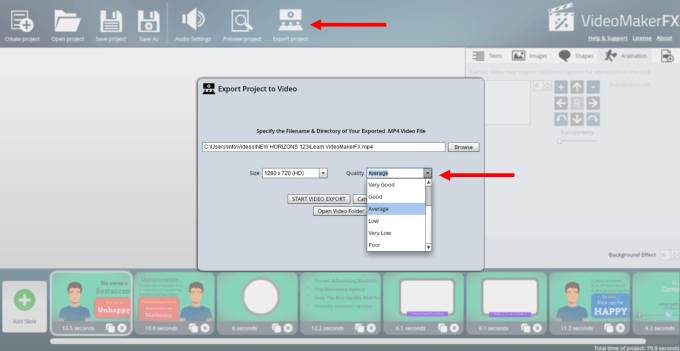
It’s now time to render or export your video. Select Export project from the top bar navigation. Browse to select the directory and filename of your exported video file. You can also select the size with 1280 x 720 (HD) being the highest resolution. Pay attention to the Quality option. The default setting is Average. You will get the best quality – but it will take longer to upload – if you choose the Perfect option. The directions above show you how to create a simple video using one of the many templates from VideoMakerFX. The more you use the product, the easier it will become. With experience, you will learn how to mix and match Slide Layouts from different Slide Themes to create a unique video that doesn’t look exactly like the template. You will also see how easy it is to change colors, backgrounds, images, and more so that you can brand your video to your company and your message.
