If you keep access to these pages available, it becomes easier for users to uninstall programs, mess with system settings, and potentially cause issues for other users that will access that computer at a later point. You can follow our guide below to learn how to disable the control panel and settings, or limit what is and isn’t available in the control panel. If you want to go further, read our other articles on using Group Policy to block access to the command prompt and prevent shutdown of a PC.
Disable all Control Panel and
Settings Access
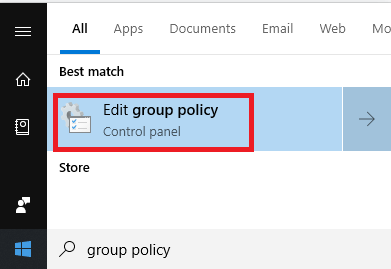
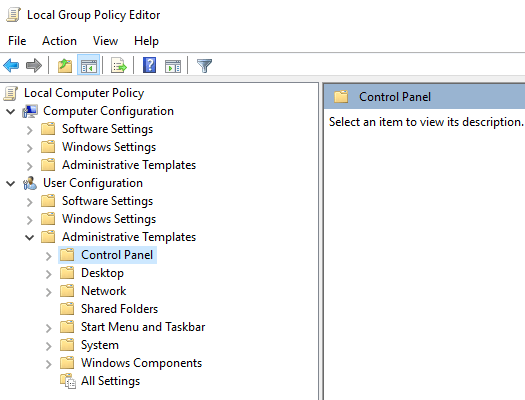
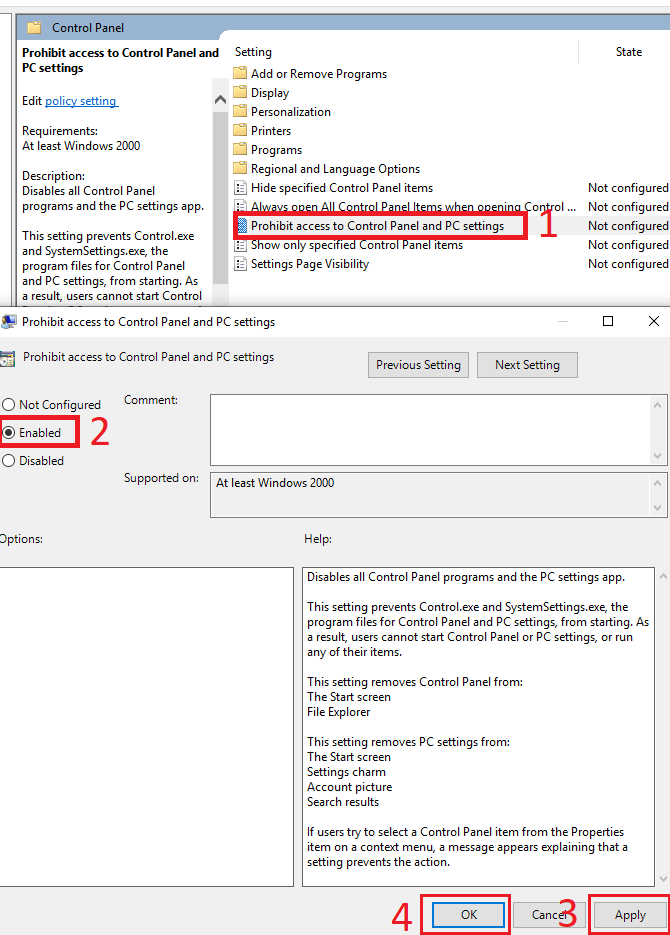
There are two methods available for disabling control panel and settings access on Windows 10. The first method is the easiest, so we’ll explain that to begin with. This method requires you to be running Windows 10 Pro or Enterprise. If you are running Windows 10 Home, don’t worry, you can try the second method instead.I First, press the Windows key and then type Group policy – click on Edit group policy when it appears. On the left side, click to open Administrative templates under the User Configuration section. Next, click on Control Panel. On the right side panel, double click Prohibit access to Control Panel and PC settings. Next, click Enabled. Then, click Apply. Finally, click OK. You must change this account to a standard user after making this change. Without changing to a standard user, you can remove it at any point by following the steps above, but by choosing ‘Not Configured’.
Disable Control Panel for Windows
10 Home Users
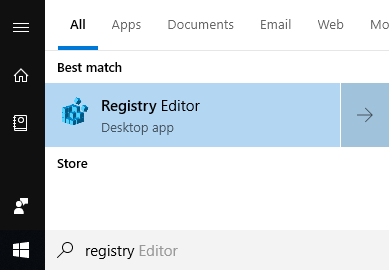
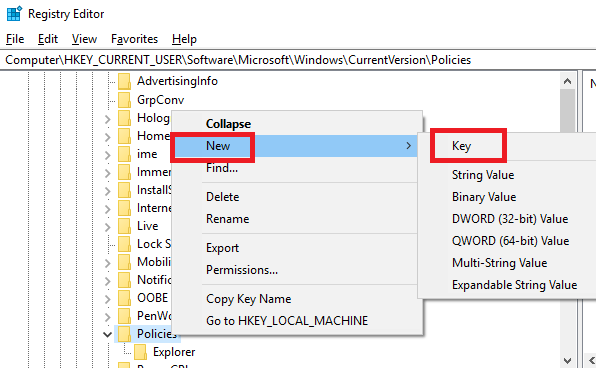
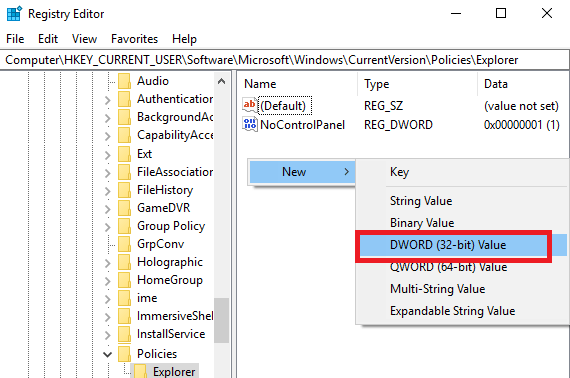
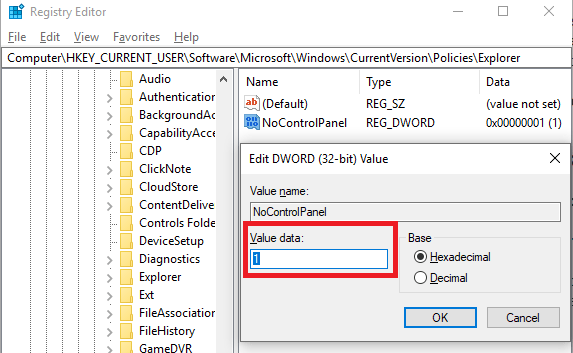
If you are on Windows 10 Home, you can use the method we have explained below instead. This method involves using a registry change, so make sure you follow the steps carefully. For Windows 10 Home users, first you need to turn the account you’d like to make the changes to into an administrator account. Once you’ve followed through with the steps below, you can then switch it back to a standard account. Press the Windows key and type registry. Next, click on Registry Editor in the search results. On the left side, click to open HKEY_CURRENT_USER, then follow the path below. Don’t see the Explorer folder in Policies? You can right click it and click New, then click Key. Once the new folder has been created, rename it to Explorer, then click away from the folder to finalize the name. Next, click on the Explorer folder. After, right click an empty space on the right side of the registry editor. Then, click New, then click DWORD (32-bit) Value. Where it says ‘New Value #1’, type NoControlPanel then press enter. After that, double click NoControlPanel and change the value data from 0 to 1. Click OK. That’s it! Now, restart your PC and test to see if the settings menu and control panel are blocked. If they are, you can revert the account back to a standard account so that the setting cannot be removed.
Hide Specific Control Panel Items
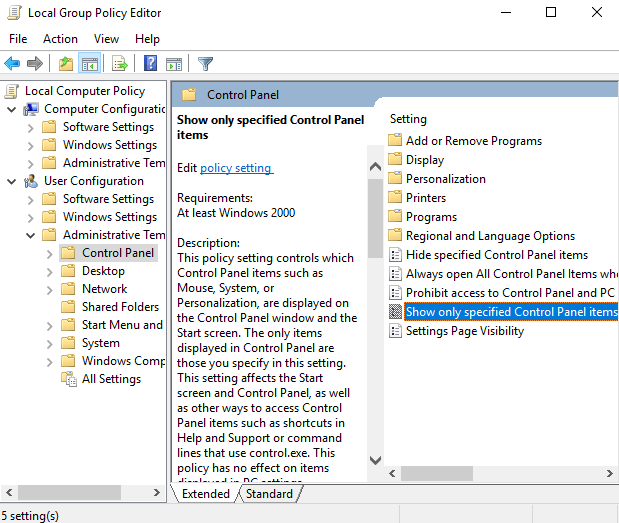
The two methods above explain how to completely disable both the control panel, what if you only want to limit certain control panel elements? With the method below, you can do exactly that. First, press the Windows key and type Group Policy. Click on the Edit Group Policy option that appears.
Next, click User Configuration on the left.Then, click to expand the Administrative Templates folder.After, click on Control Panel.Finally, on the right, double click on Show only specified Control Panel items.
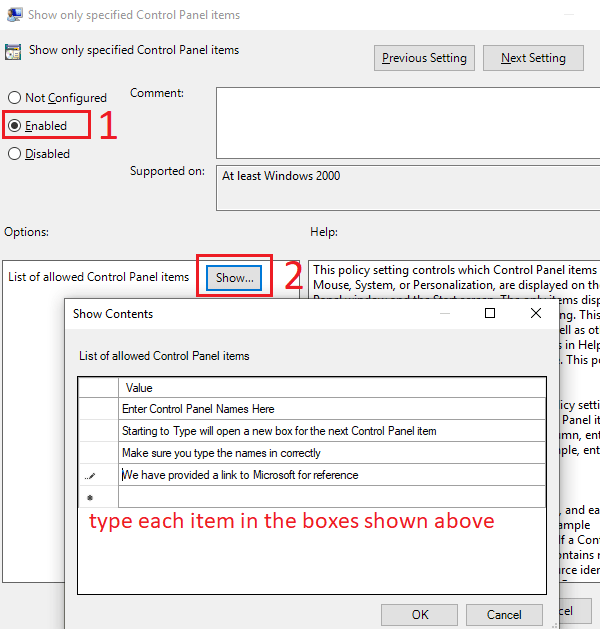
On the next window, click on Enabled. After this, you can click Show. From here, you can manually enter each control panel item that you would like a user to have access to. If it’s not included on this list, it will not appear! This means you’ll need to carefully pick and type out each Control Panel item you’d like to include. You can find the names of all Control Panel items on Microsoft’s website. At any time, you can follow the steps above, but choose the ‘disabled’ the option to re-enable all control panel items.
Summary
I hope that this guide has proven to be useful. Have any questions about the three methods I’ve included? If you do, please leave a comment below and I’ll happily get back to you when I can.
